Graphic designer: “So far we built up our UX to be highly interactive, We focused on put here a fantastic name for a simple stuff making it beautiful, responsive and attractive.”
Me who lost 4 hours implementing it and saw how users use it: “So why nobody understands it?”
I don’t know if you ever had a conversation like this but the next immediate reactions are like ⚡🎯💣💥 and suddenly someone appears saying that he also designed an alternative version but was rejected for some reasons. Implementing multiple versions of something costs money but if something doesn't work as expected it can cost more than the second implementation.
For an IT project, the best way to understand how and if something works is to set some KPI, for those who are hearing this for the first time, KPI stands for Key Performance Indicator and represents a metric you want to track to check the performance of specific stuff (for example, after marketing affiliation you may want to track sellings increase in a certain time range). For graphics components, KPI can be set on specific subcomponents like buttons, clickable or focusable subcomponents, but they just measure the interactions that you can compare with the number of total visits; if you have multiple implementations for the same component and want to check which performs better, you have to use A/B Tests.
A/B Tests are a kind of test where you literally split your audience proposing them a different version of your content: if you have two implementations for a view, with A/B Tests you can propose the version A to the 50% of your audience and the version B to the other 50%, then measure your KPI for each version and here you got the winning version! (or a tie in a very rare situation.)
Setup
In most cases, you don’t need to write your own a/b testing engine, you can stick to an existing one, set it up and focus on your business logic implementation. For Laravel applications, theben182/laravel-abpackage gets you ready in a few minutes, you can find it on Github. Installing is an immediate process via composer composer require ben182/laravel-ab and you’re ready to go.
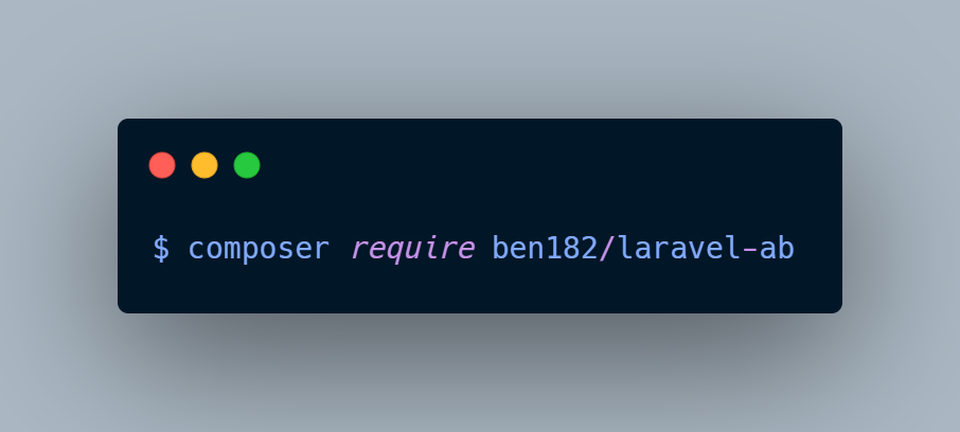
A/B Test package installation
Please note that this doesn’t mean that you can’t write your personal a/b testing code: if you want to create a custom funnel with many facets and this package doesn’t satisfy your ambitions you can always implement your custom solution!
After the package is correctly installed we just have to publish configuration and migrate it!
php artisan vendor:publish --provider="Ben182\AbTesting\AbTestingServiceProvider"This will publish the config file config/ab-testing.php to tweak later. After that you just php artisan migrate and this will publish the two expected tables:
Migrating: 2019_02_02_200315_create_experiments_table
Migrated:  2019_02_02_200315_create_experiments_table (0.01 seconds)
Migrating: 2019_02_02_213123_create_goals_table
Migrated:  2019_02_02_213123_create_goals_table (0.01 seconds)
First test: A or B?
Let’s keep it simple: you want to test a text and a button style in your index path. To be creative, we can name our tests: blue-button and purple-button. To start these tests, just open the config file and add your test names to the experiments array:
return [
    'experiments' => [
        'blue-button',
        'purple-button',
    ],
    // ...
];
Now just focus on content, but how? For the view part, there’s the @ab utility that can let you switch between tests.
@ab('blue-button')
<div class="title m-b-md">
    This is the blue button test.
</div>
<a href="{!! url('/specialPage') !!}" class="blue-button">
    Blue test
</a>
@elseab('purple-button')
<div class="title m-b-md">
    This is the purple button test.
</div>
<a href="{!! url('/specialPage') !!}" class="purple-button">
    Purple test
</a>
@endab
And that’s it, it’s really simple and you can really use it everywhere in your blade file. This way, as you can see below, you will see a different content basing on when you open the page, the experiment users distribution are equally distributed.
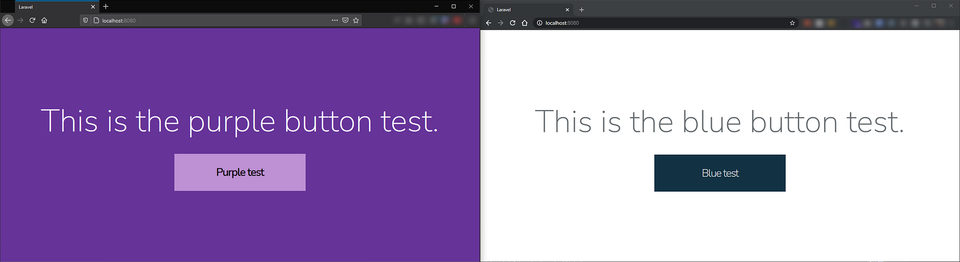
A or B?
Running the command php artisan ab:report you can see how many users landed on each experiment.
$ php-fpm php artisan ab:report
+---------------+----------+
| Experiment    | Visitors |
+---------------+----------+
| blue-button   | 1        |
| purple-button | 1        |
+---------------+----------+
If you want to look closely on how the @ab utility works, it’s literally just an if
@if (AbTesting::isExperiment('your-experiment-name'))That utility is implemented into the service provider and you can also deep into the plugin source code on its Github.
Start measuring
The a/b test purpose, in general, is to measure which between different views can lead to better conversion.
To start measuring conversion, we set goals in our config file. A simple goal can be user visits through our button.
'goals' => [
    'page-visited'
],
The command php artisan ab:report will let you see how many conversions you reached through each experiment.
$ php-fpm php artisan ab:report
+---------------+----------+-------------------+
| Experiment    | Visitors | Goal page-visited |
+---------------+----------+-------------------+
| blue-button   | 1        | 0 (0%)            |
| purple-button | 1        | 0 (0%)            |
+---------------+----------+-------------------+
To track a conversion, basing on your conditions, you just need to add
AbTesting::completeGoal('your-goal-name');In this specific case, the goal is completed when the button is clicked and the page is loaded. The page code will be really simple, it will just trigger the goal completion:
AbTesting::completeGoal('page-visited');
return view('completed');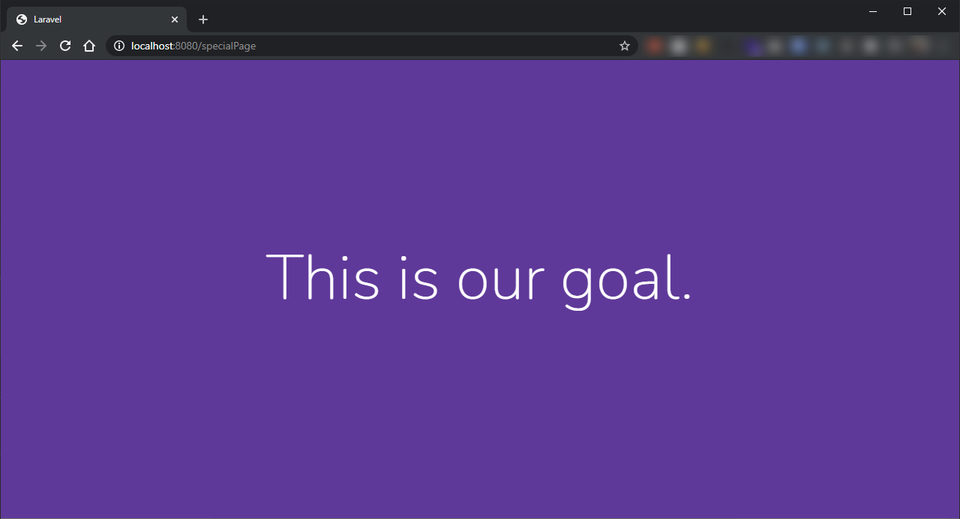
A/B Testing Example Goal
To check reached goals stats, you can run again php artisan ab:report.
+---------------+----------+-------------------+
| Experiment    | Visitors | Goal page-visited |
+---------------+----------+-------------------+
| blue-button   | 1        | 0 (0%)            |
| purple-button | 1        | 1 (100%)          |
+---------------+----------+-------------------+
And that’s it, use this to measure and improve your projects, one statistic at a time!
Stay tuned for other Data-Driven Strategies and if you want, take a moment ️️to leave a comment about how you take data-driven decisions supported by tools! ☕️
The package database structure
What if you want to integrate these stats in a custom page? Let’s deep into the database structure. The package is made of two tables ab_experiments and ab_goals, with the relative models Goal and Experiment.
The ab_experiments table structure:
+------------+------------------+------+-----+----------------+
| Field      | Type             | Null | Key | Extra          |
+------------+------------------+------+-----+----------------+
| id         | int(10) unsigned | NO   | PRI | auto_increment |
| name       | varchar(255)     | NO   | UNI |                |
| visitors   | int(11)          | NO   |     |                |
| created_at | timestamp        | YES  |     |                |
| updated_at | timestamp        | YES  |     |                |
+------------+------------------+------+-----+----------------+
The ab_goals table structure:
+---------------+------------------+------+-----+----------------+
| Field         | Type             | Null | Key | Extra          |
+---------------+------------------+------+-----+----------------+
| id            | int(10) unsigned | NO   | PRI | auto_increment |
| name          | varchar(255)     | NO   |     |                |
| hit           | int(11)          | NO   |     |                |
| experiment_id | int(11)          | NO   |     |                |
| created_at    | timestamp        | YES  |     |                |
| updated_at    | timestamp        | YES  |     |                |
+---------------+------------------+------+-----+----------------+
You can import the relative models from its namespace Ben182\AbTesting\Models.
Using the model Experiment let you access all experiments data, you can get Goals data via the goals property (implemented via the Laravel hasMany).
Using the model Goal let you access to all Goal data, you can directly access its experiment via the experiment property (implemented via the Laravel belongsTo).
So if you want to get the purple button experiment you can use a standard Eloquent query
$purpleExperiment = Experiment::whereName('purple-button')->first();And take its goals just accessing them
$purpleExperiments->goalsBy using the package models, you can show every stat you want in your custom pages!