
Photo by Carlos Muza on Unsplash
You’ve spent the latest X hours building a very complex system, with lots of complex interactions and features, you wrote tests and now everything works. But you haven’t a Dashboard where you can monitor details of your system and perform CRUD operations on your system models, and you don’t want to spend much time spinning up a dashboard that you don’t directly need or won’t directly use, so?
This is, in shorts, what happened to me some days ago. I want to give you a background without biasing your view on the entire idea of this blog post. I had to build a complex system where you can perform just one operation, the system has just one complex feature: the user must upload files, pick a configuration, insert his email (yes, the user has no logins) and then give everything to the server that enqueues a job; this job works in the background performing the stuff it has to do and finally sends an email. It was a beautiful system to code (if you like coding 💻 like me), I had to glue Laravel with some bash scripts, I wrote tests, checked for security faults, but… what about if the managers want to see the current status of the jobs and what users do? And I started looking for the fastest way to build a nice dashboard with CRUD operations, with the fewer code to write and the best possible result, and here it is InfyOmLabs Laravel Generator!
🔧 Setup everything
I’ll start from an existing project, but everything here can be replicated easily in every project even a new one.
As said before, in my project I don’t have any user model (because I have no login), so I’ll start from its migration. You can safely take the laravel built-in migration, and programmatically create a user via tinker or in some other way, I’ll put tinker code:
User::create([
    'name' => 'Kalizi',
    'email' => '****@******.***',
    'password' => \Hash::make('myBeautifulPassword'),
]);
Now we’re ready to build the dashboard with the generator, we need to start from composer.json :
"require": {
    // Your dependencies
    "infyomlabs/laravel-generator": "8.0.x-dev",
    "laravelcollective/html": "^6.2",
    "infyomlabs/adminlte-templates": "8.0.x-dev",
    "doctrine/dbal": "~2.3",
    "yajra/laravel-datatables": "^1.5",
    "yajra/laravel-datatables-buttons": "^4.10",
    "yajra/laravel-datatables-oracle": "~9.0"
},
With these packages, you’ll add the generator, HTML generator, adminlte-template for the dashboard, dbal to read schemas from the database and use for generation, yajra datatables packages for jQuery datatables generation and server interactions made easy. If you prefer, you can switch the template to CoreUI using "infyomlabs/coreui-templates": "8.0.x-dev" (instead of the adminlte). Now just composer update .
Now publish config php artisan vendor:publish --provider="InfyOm\Generator\InfyOmGeneratorServiceProvider" and we’re ready to go!
Now tweak config/infyom/laravel_generator.php by editing:
path: if you want to put every generated content into a specific folder, in my case I wanted everything to be under anadminfolder, so I appended/adminas the folder where needed (views). This is particularly helpful if you want to separate admin stuff from your system code.'templates' => 'your_template_here': you can putadminlte-templatesorcoreui-templates.'repository_pattern' => falsein the options key, I don’t like repository so much, but you can keep it if you prefer'prefixes' => [ 'route' => 'admin', 'path' => 'admin', 'views' => '', 'public' => '' ]this will add every route asadmin.?in the path/admin.'datatables' => trueif you want to enable datatables, personally I love them.'tests' => falseit’s a generator and I won’t perform any particular editing on generated files, so I don’t really need tests (it’s on you).
Last but not least, we have to publish infyom default files for the generation with php artisan infyom:publish and with php artisan infyom.publish:layout (this last command will generate views even for authentication, if you already have, will prompt for overwriting). If you want to use datatables (with server-side rendering), you also have to publish datatables stuff by running php artisan vendor:publish --tag='datatables-button'.
Now we’re ready to go!
✏️ Our first CRUD️

Photo by Galymzhan Abdugalimov on Unsplash
InfyOm is ready and now we can generate our CRUD via artisan, how? Let’s see what commands we can perform by running php artisan:
infyom
  infyom:api                  Create a full CRUD API for given model
  infyom:api_scaffold         Create a full CRUD API and Scaffold for given model
  infyom:migration            Create migration command
  infyom:model                Create model command
  infyom:publish              Publishes & init api routes, base controller, base test cases traits.
  infyom:repository           Create repository command
  infyom:rollback             Rollback a full CRUD API and Scaffold for given model
  infyom:scaffold             Create a full CRUD views for given model
 infyom.api
  infyom.api:controller       Create an api controller command
  infyom.api:requests         Create an api request command
  infyom.api:tests            Create tests command
 infyom.publish
  infyom.publish:layout       Publishes auth files
  infyom.publish:templates    Publishes api generator templates.
  infyom.publish:user         Publishes Users CRUD file
 infyom.scaffold
  infyom.scaffold:controller  Create controller command
  infyom.scaffold:requests    Create a full CRUD views for given model
  infyom.scaffold:views       Create views file command
We have lots of commands we can run, and every command has lots of options. I don’t need everything so I’ll concentrate on the scaffold command and we’ll deep into its options by running php artisan infyom:scaffold --help (I will omit laravel default options like --help or -v|vv|vvv and focus just on the generator options)
Description:
  Create a full CRUD views for given model
Usage:
  infyom:scaffold [options] [--] <model>
Arguments:
  model                                      Singular Model name
Options:
      --fieldsFile=FIELDSFILE                Fields input as json file
      --jsonFromGUI=JSONFROMGUI              Direct Json string while using GUI interface
      --plural=PLURAL                        Plural Model name
      --tableName=TABLENAME                  Table Name
      --fromTable                            Generate from existing table
      --ignoreFields=IGNOREFIELDS            Ignore fields while generating from table
      --save                                 Save model schema to file
      --primary=PRIMARY                      Custom primary key
      --prefix=PREFIX                        Prefix for all files
      --paginate=PAGINATE                    Pagination for index.blade.php
      --skip=SKIP                            Skip Specific Items to Generate (migration,model,controllers,api_controller,scaffold_controller,repository,requests,api_requests,scaffold_requests,routes,api_routes,scaffold_routes,views,tests,menu,dump-autoload)
      --datatables=DATATABLES                Override datatables settings
      --views=VIEWS                          Specify only the views you want generated: index,create,edit,show
      --relations                            Specify if you want to pass relationships for fields
      --softDelete                           Soft Delete Option
      --forceMigrate                         Specify if you want to run migration or not
      --factory                              To generate factory
      --seeder                               To generate seeder
      --localized                            Localize files.
      --repositoryPattern=REPOSITORYPATTERN  Repository Pattern
      --connection=CONNECTION                Specify connection name
As you can see, there’s a lot of options you can tweak and exploit to get a CRUD as fast as you can.
Now you have to focus on your database, my model name is ProcessingSession (table name: processing_sessions) that has a one-to-many relationship with ProcessingFile (table name: processing_files). The command I used to set up the first CRUD is:
php artisan infyom:scaffold --fromTable --tableName=processing_sessions --factory --seeder --skip=model ProcessingSessionTake a look at every option:
--fromTable --tableName=processing_sessionsthese options are needed to get model data from the database. By using dbal, this will fetch the table structure from the database and use every detail about the table structure for the generation.--factorywill generate a factory for the model.--seederwill generate a seeder for the model.--skip=modelthis is needed if you already have your own model implementation, if you don’t have any model in your project, this will generate a Model file for your table.
The output will be something like:
Factory created:
ProcessingSessionFactory.php
Seeder created:
ProcessingSessionsTableSeeder.php
Create Request created:
CreateProcessingSessionRequest.php
Update Request created:
UpdateProcessingSessionRequest.php
DataTable created:
ProcessingSessionDataTable.php
Controller created:
ProcessingSessionController.php
Generating Views...
datatables_actions.blade.php created
table.blade.php created
index.blade.php created
field.blade.php created
create.blade.php created
edit.blade.php created
show_fields.blade.php created
show.blade.php created
Views created.
processingSessions routes added.
processingSessions menu added.
Schema File saved:
ProcessingSession.json
Generating autoload files
What happened after this command? Lookup at file changes:
New:
app/Http/Controllers/Admin/ProcessingSessionController.php
app/Http/Requests/Admin/CreateProcessingSessionRequest.php
app/Http/Requests/Admin/UpdateProcessingSessionRequest.php
database/factories/ProcessingSessionFactory.php
database/seeders/ProcessingSessionTableSeeder.php
resources/views/admin/processing_sessions/*.blade.php
Changed:
routes/web.php
InfyOm just publishes stuff, doesn’t add user checking, so we have to build a Middleware php artisan make:middleware AdminMiddleware and add any logic you want.
Now open routes/web.php, fix the Controller generated (if it doesn’t work) and add the middleware:
use App\Http\Controllers\Admin\ProcessingSessionController;
Route::group(
    [
        'prefix' => 'admin',
        'as' => 'admin.',
        'middleware' => \App\Http\Middleware\AdminMiddleware::class
    ],
    function () {
        Route::resource('processingSessions', ProcessingSessionController::class);
    }
);
We still need two tweaks, open the Controller, the Requests and the DataTable and fix your model imports from App\Models\Admin\Model to App\Models\Model or to whichever is your model namespace. The other is to add validation rules in your model as a static property. If you look at your request classes you can see that in the rules() methods InfyOm uses the static property Model::$rules that you must add to your model.
And we’re ready to go, if authentication works, you can open admin/processingSessions and here’s the CRUD!
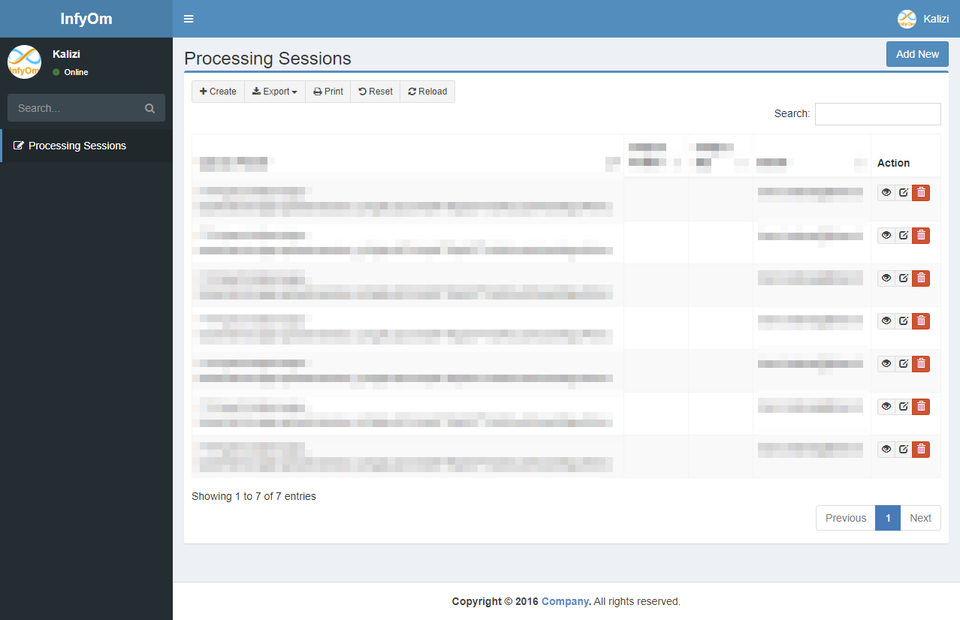
Basic CRUD built with InfyOm, ready for customization
Every other crud will be kinda the same. Every time you generate a CRUD you’ll have the following files:
┌── create.blade.php
├── datatables_actions.blade.php
├── edit.blade.php
├── fields.blade.php
├── index.blade.php
├── show.blade.php
├── show_fields.blade.php
└── table.blade.php
If you want to edit any step of the CRUD process, you’ll have to edit the relative file (if you want to show relations you can edit the show.blade.php putting their models by injecting from the controller, if you use Eloquent default relations you can do it easily).
Please note: the fields.blade.php file is shared between the Create and the Update steps, it uses the Form facade that will automatically inject the model. While in Create step the model isn’t defined, so if you edit the file pay attention to don’t mess up by using the model instance without that it’s set and initialized using a simple isset($modelName).
🧱 Building a dashboard
Your adminlte template is already setup, you just have to build a view to exploit it. Start with a view in views/admin/index.php that extends views/layouts/app.blade.php and overrides the section content.
After that, build a Controller to handle it php artisan make:controller Admin\DashboardController with an index function that renders the previous view, to link to a route under the group we’ve previously created.
use App\Http\Controllers\Admin\DashboardController;
Route::group(
    [
        'prefix' => 'admin',
        'as' => 'admin.',
        'middleware' => \App\Http\Middleware\AdminMiddleware::class
    ],
    function () {
        Route::get('/', [DashboardController::class, 'index'])->name('index');
        // ... your other CRUDs
    }
);
You should see an empty dashboard:
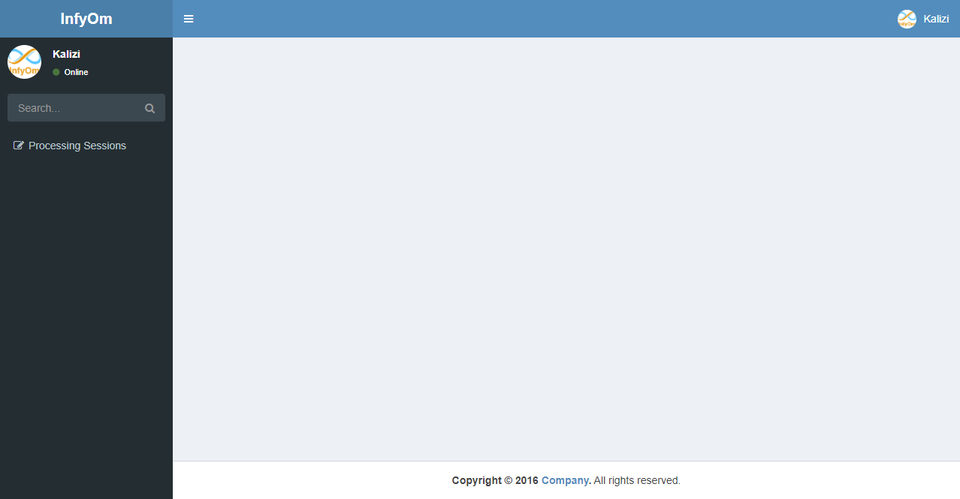
Building your dashboard
We want to tweak a few stuff, open views/layouts/app.blade.php, edit the the “InfyOm logo” with yours and with the basic admin URL
<a href="{!! route('admin.index') !!}" class="logo">
    <img src="{!! asset('/img/your_logo.png') !!}" alt="Your Project Dashboard" />
</a>
Scroll to the footer and edit the “Copyright” section
<footer class="main-footer" style="max-height: 100px;text-align: center">
    <strong>Copyright © 2020 <a href="{!! url('/') !!}">Project</a>.</strong> All rights reserved.
</footer>
Everything you have to do now is to compose your dashboard using AdminLTE components from the official documentation, Laravel and Blade Components.
🧠Do you want more?
Check AdminLTE Dependencies and import plugins in your views/layouts/app.blade.php. Do you want to be even faster? You can check other helper packages like this helper for Chart.js. Everything you have to do is to exploit the power of Laravel in combination with this generator!
And that’s all! ✌🏻